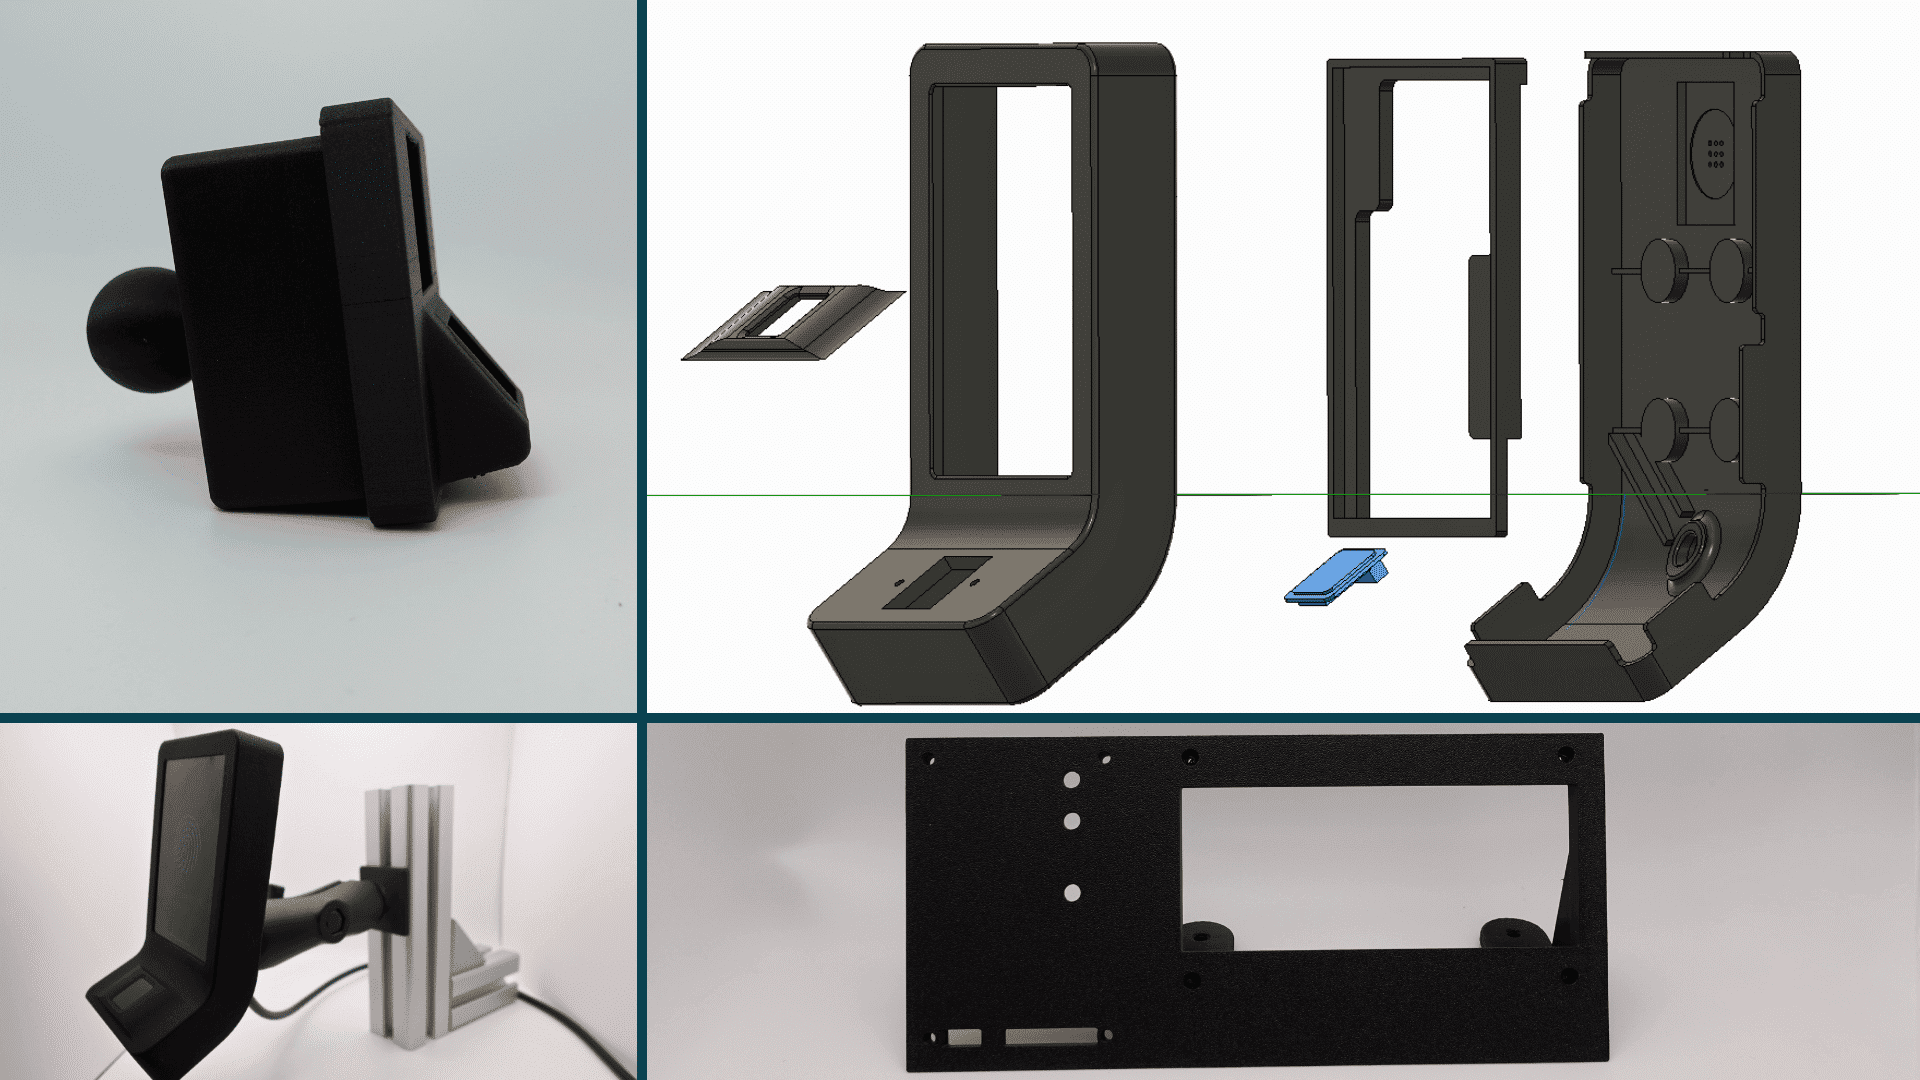
Why Custom Enclosures?
Standard enclosures rarely fit perfectly. Drill holes are misaligned, circuit boards sit loosely, and cable routing is missing. Custom 3D-printed enclosures solve this problem: they are designed precisely around your electronics, offering optimal protection, exact fit, and a professional appearance.
Advantages Over Standard Enclosures
Perfect Fit
Each enclosure is individually adapted to the circuit board, connectors, and mounting points. No milling, no drilling, no compromises.
Fast Availability
From CAD design to finished enclosure in just a few days. Ideal for prototypes, first samples, and small series.
Cost Efficiency at Low Volumes
Injection mold tooling often costs several thousand euros. 3D printing enables economically viable production starting from batch size 1.
Design Freedom
Organic shapes, integrated ventilation slots, snap-fit connections, and embedded labeling are all easily achievable.
Material Selection for Enclosures
PLA
Easy to print with good surface quality. Suitable for prototypes and indoor applications without high temperature exposure.
PETG
Chemical resistant, impact resistant, and food-safe. The all-rounder for functional enclosures.
ABS
Heat resistant up to approximately 100 degrees Celsius and can be post-processed with acetone vapor smoothing. Proven choice for electronics enclosures.
ASA
UV resistant and weatherproof. The first choice for outdoor enclosures.
PA12 (Nylon)
Mechanically robust and wear resistant. Ideal for industrial enclosures under high stress.
Design Tips
- Wall thickness: Minimum 1.5 mm for stable enclosures, 2.0 mm for mechanically stressed areas.
- Tolerances: Plan for 0.2 to 0.3 mm clearance for fits.
- Snap-fit connections: Enable tool-free opening and closing. Minimum clip width: 1.5 mm.
- Ventilation: Integrated ventilation slots keep electronics cool. Minimum slot width: 1.0 mm.
- Mounting elements: Brass heat-set inserts can be pressed in with a soldering iron and provide secure screw connections.
- Cable routing: Openings with rounded edges protect cables from damage.
The Path to Your Finished Enclosure
- Requirements analysis: What electronics need protection? What environmental conditions exist?
- CAD design: Precise modeling around the existing hardware
- Print prototype: Initial functional test and fit check
- Iteration: Adjustments based on feedback
- Series production: Manufacturing the desired quantity
Conclusion
Custom 3D-printed enclosures are the direct path to professional solutions without compromise. Whether a single unit or small series, 3D printing makes individual enclosures accessible and affordable for every business.